安装 Composer
Download Composer mv composer.phar /usr/local/bin/composer
安装 satis 1 2 3 4 5 mkdir /usr/ local/ my-satis/ cd /usr/ local/ my-satis/ composer create-project composer/ satis --stability=dev --keep-vcs .sudo ln -s /usr/ local/ my-satis/ bin/ satis /usr/ local/ bin/
PHP 7 下的安装过程可能会发生一些错误,参考 PHP7 : install ext-dom issue 修正即可
1 2 3 sudo apt-get update sudo apt-get install php-xml sudo apt-get install php-mbstring
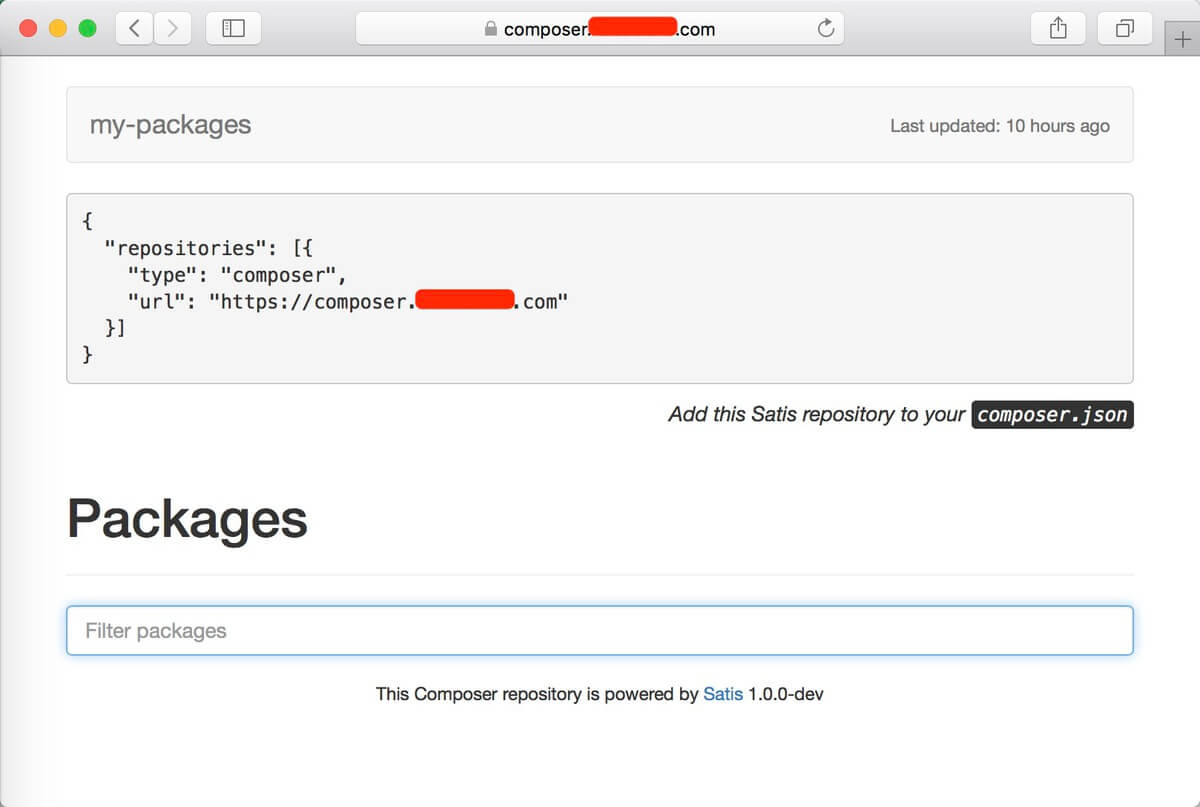
使用 satis 1 2 3 4 5 satis init --name=my-packages --homepage=https ://composer.xxxxxx.com satis build satis.json /var/www/composer.xxxxxx.com
生成静态网页后,配置相关 Server,使其能够接受 http / https 访问,可通过浏览器访问进行验证。
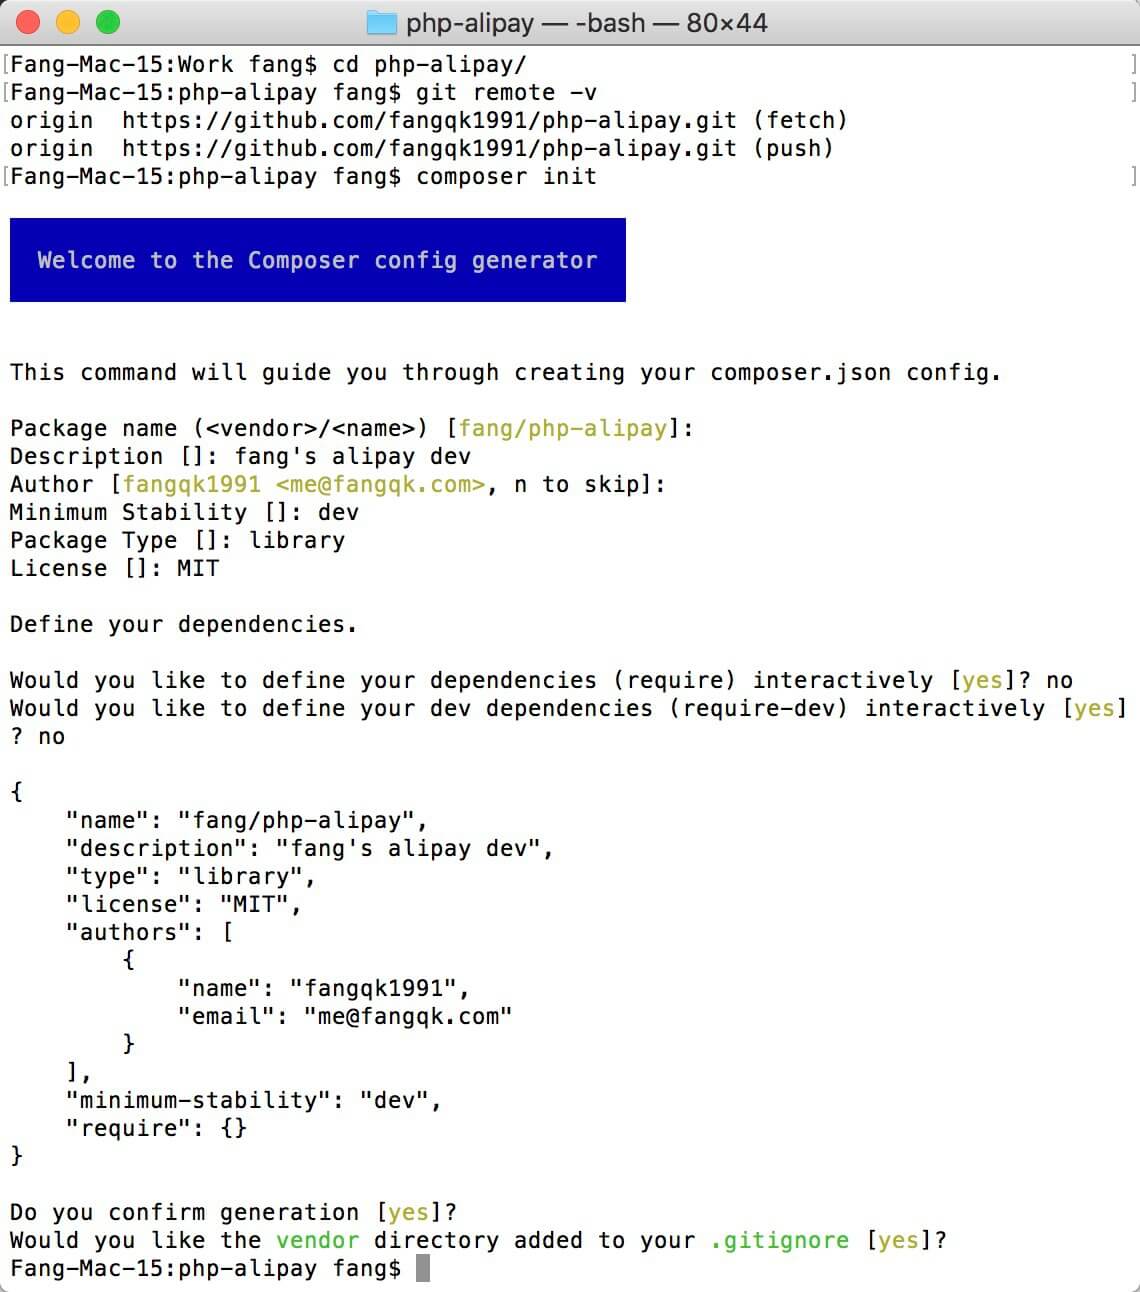
模块工程 以个人 Github 模块工程 php-alipay 为例
1 2 ## 初始化 composer 工程 composer init
发布版本
1 2 3 4 5 git add . git commit -m "Init composer" git tag -m "first release" 0.1 .1 git push --tags
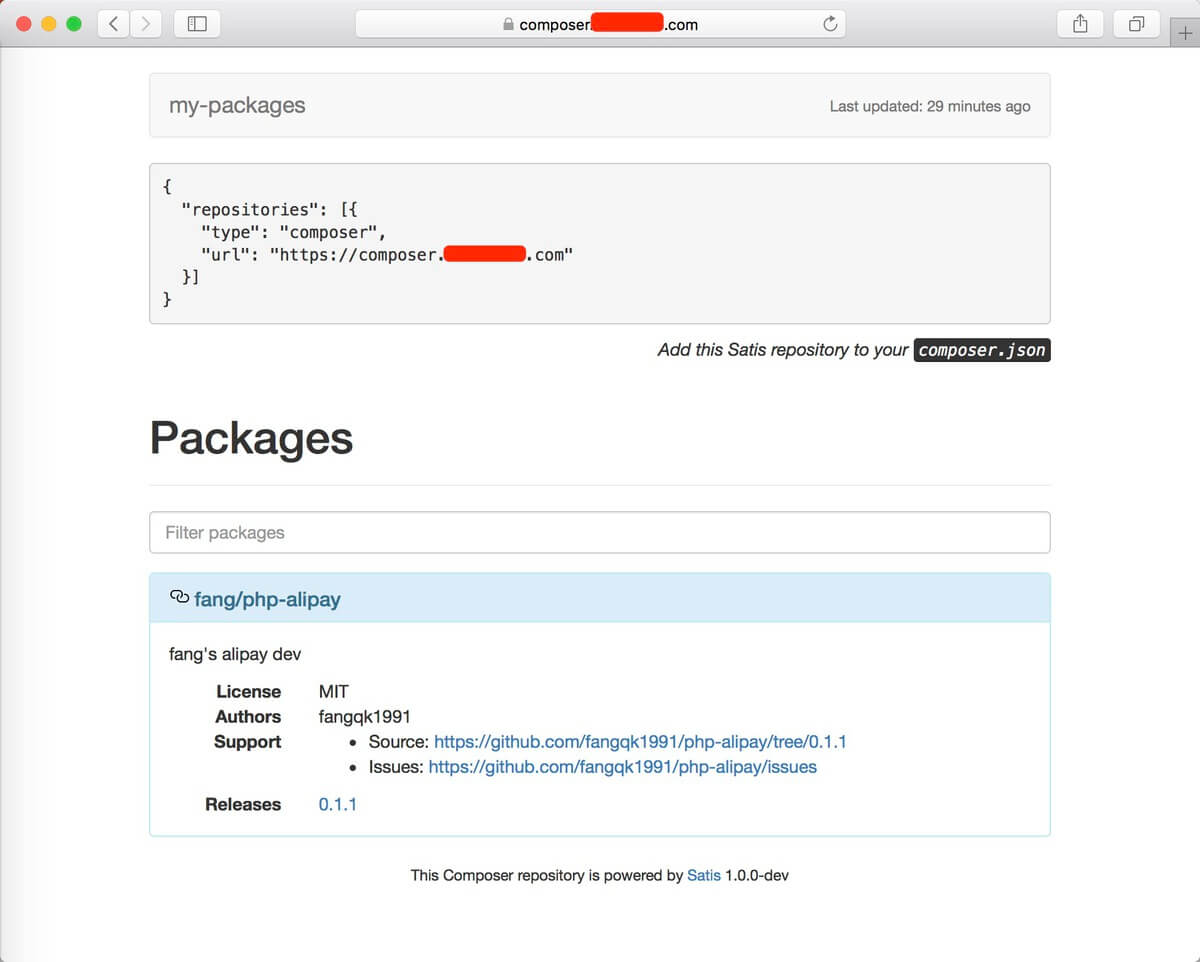
更新 satis.json 回到 satis.json 所在的目录,为 satis.json 添加相应的 repositories 信息,然后重新构建
1 satis build satis.json /var/www/composer.xxxxxx .com
如果模块工程为私有工程,会收到类似如下提醒
1 2 3 4 Your GitHub credentials are required to fetch private repository metadata (https: //github.com /xxxxxx/yyyyyy.git) Head to https: //github.com /settings/tokens/new ?scopes=repo&description=xxxxxxxxxx to retrieve a token. It will be stored in "/home/your_user/.config/composer/auth.json" for future use by Composer.Token (hidden):
Tips : Github 的 token 在 Settings -> Developer settings -> Personal access tokens 获取
粘贴 token 回车即可,构建完毕后,可以看到网页预览内容已经有相关信息。
应用工程使用 参考 composer 使用文档
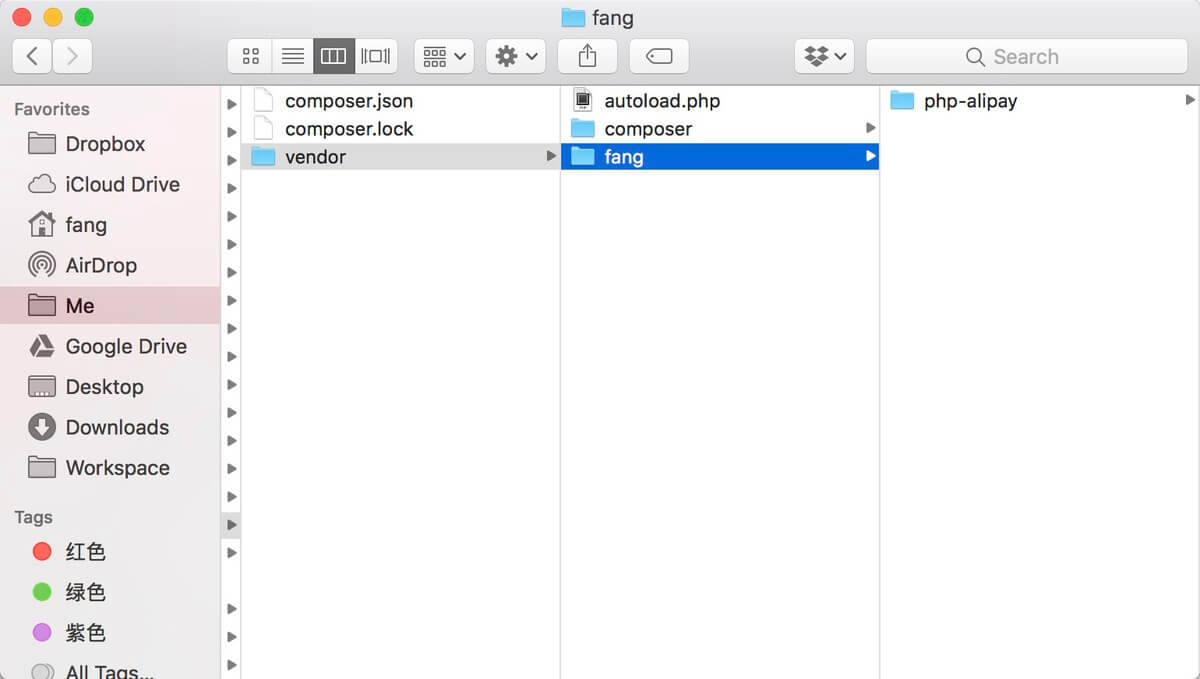
1 2 3 4 5 6 7 8 9 10 11 12 13 14 15 16 17 18 19 20 21 22 23 mkdir SomeProject/ cd SomeProject/ vi composer.json ######### composer.json 内容 ######### { "repositories" : [ { "type" : "composer" , "url" : "https://composer.xxxxxx.com" } ], "require-dev" : { "fang/php-alipay" : "0.1.1" } } #################################### ## 安装 composer install ## 工程后期更新 composer update
Tips
我的 satis 安装在服务端,模块和应用工程则在本地开发
关于访问控制,服务端对该域名仅允许指定 IP 访问
参考链接